How to Sync Multiple Class Calendars Into One - A Guide For Professors And Students
- Authors
- Name
- Eraldo Forgoli
- Published on
Table of Contents
Sync Your Class Calendars Now!
Sign Up For OneCal for free to easily sync all your class calendars in real-time.
As a professor or a student, it can be quite exhausting to keep track of your schedule for all the classes you have to attend. Managing multiple calendars gets even more challenging when you teach or attend multiple universities or schools.
In this article, we’ll explain how to sync multiple class calendars into one, keeping your availability under one calendar and focusing on getting the best out of your time at the university.
Can you natively sync class calendars into one?
There is no native solution that would allow you to sync class calendars into one or even sync class calendars together.
Outlook and Google Calendar support exporting and importing calendars, but the solution is not reliable at all, and it’s not a real sync, as it adds the imported calendar as a secondary calendar.
To learn more about exporting and importing calendars, please read our articles on:
Aside from the fact that even after exporting and importing, you still can’t use a single calendar to view all your classes, exporting and importing classes has these flaws:
- The sync is not real-time. If a seminar gets added to one of your classes, that event takes 24+ hours to reflect on the imported calendar. Often, the event won’t reflect on your other calendar at all, making the solution unreliable.
- Limited Privacy Options: You have to be familiar with the sharing features between Outlook or Google Calendar, as by default, sharing a Google Calendar means that the calendar is available to the public (even Google Search).
How to automatically sync class calendars into one?
To automatically sync class calendars, you have to use a Calendar Sync Tool like OneCal, which leverages the official Outlook and Google Calendar API to sync calendars in real-time.
This method only requires one target calendar containing all your class calendars. This way, you can view all your schedule across all your classes, using that calendar.
Automatically sync class calendars into one following these steps:
Create an account for free at OneCal (no credit card is needed): You can sign up for OneCal for free and try out the platform for two weeks at no charge.
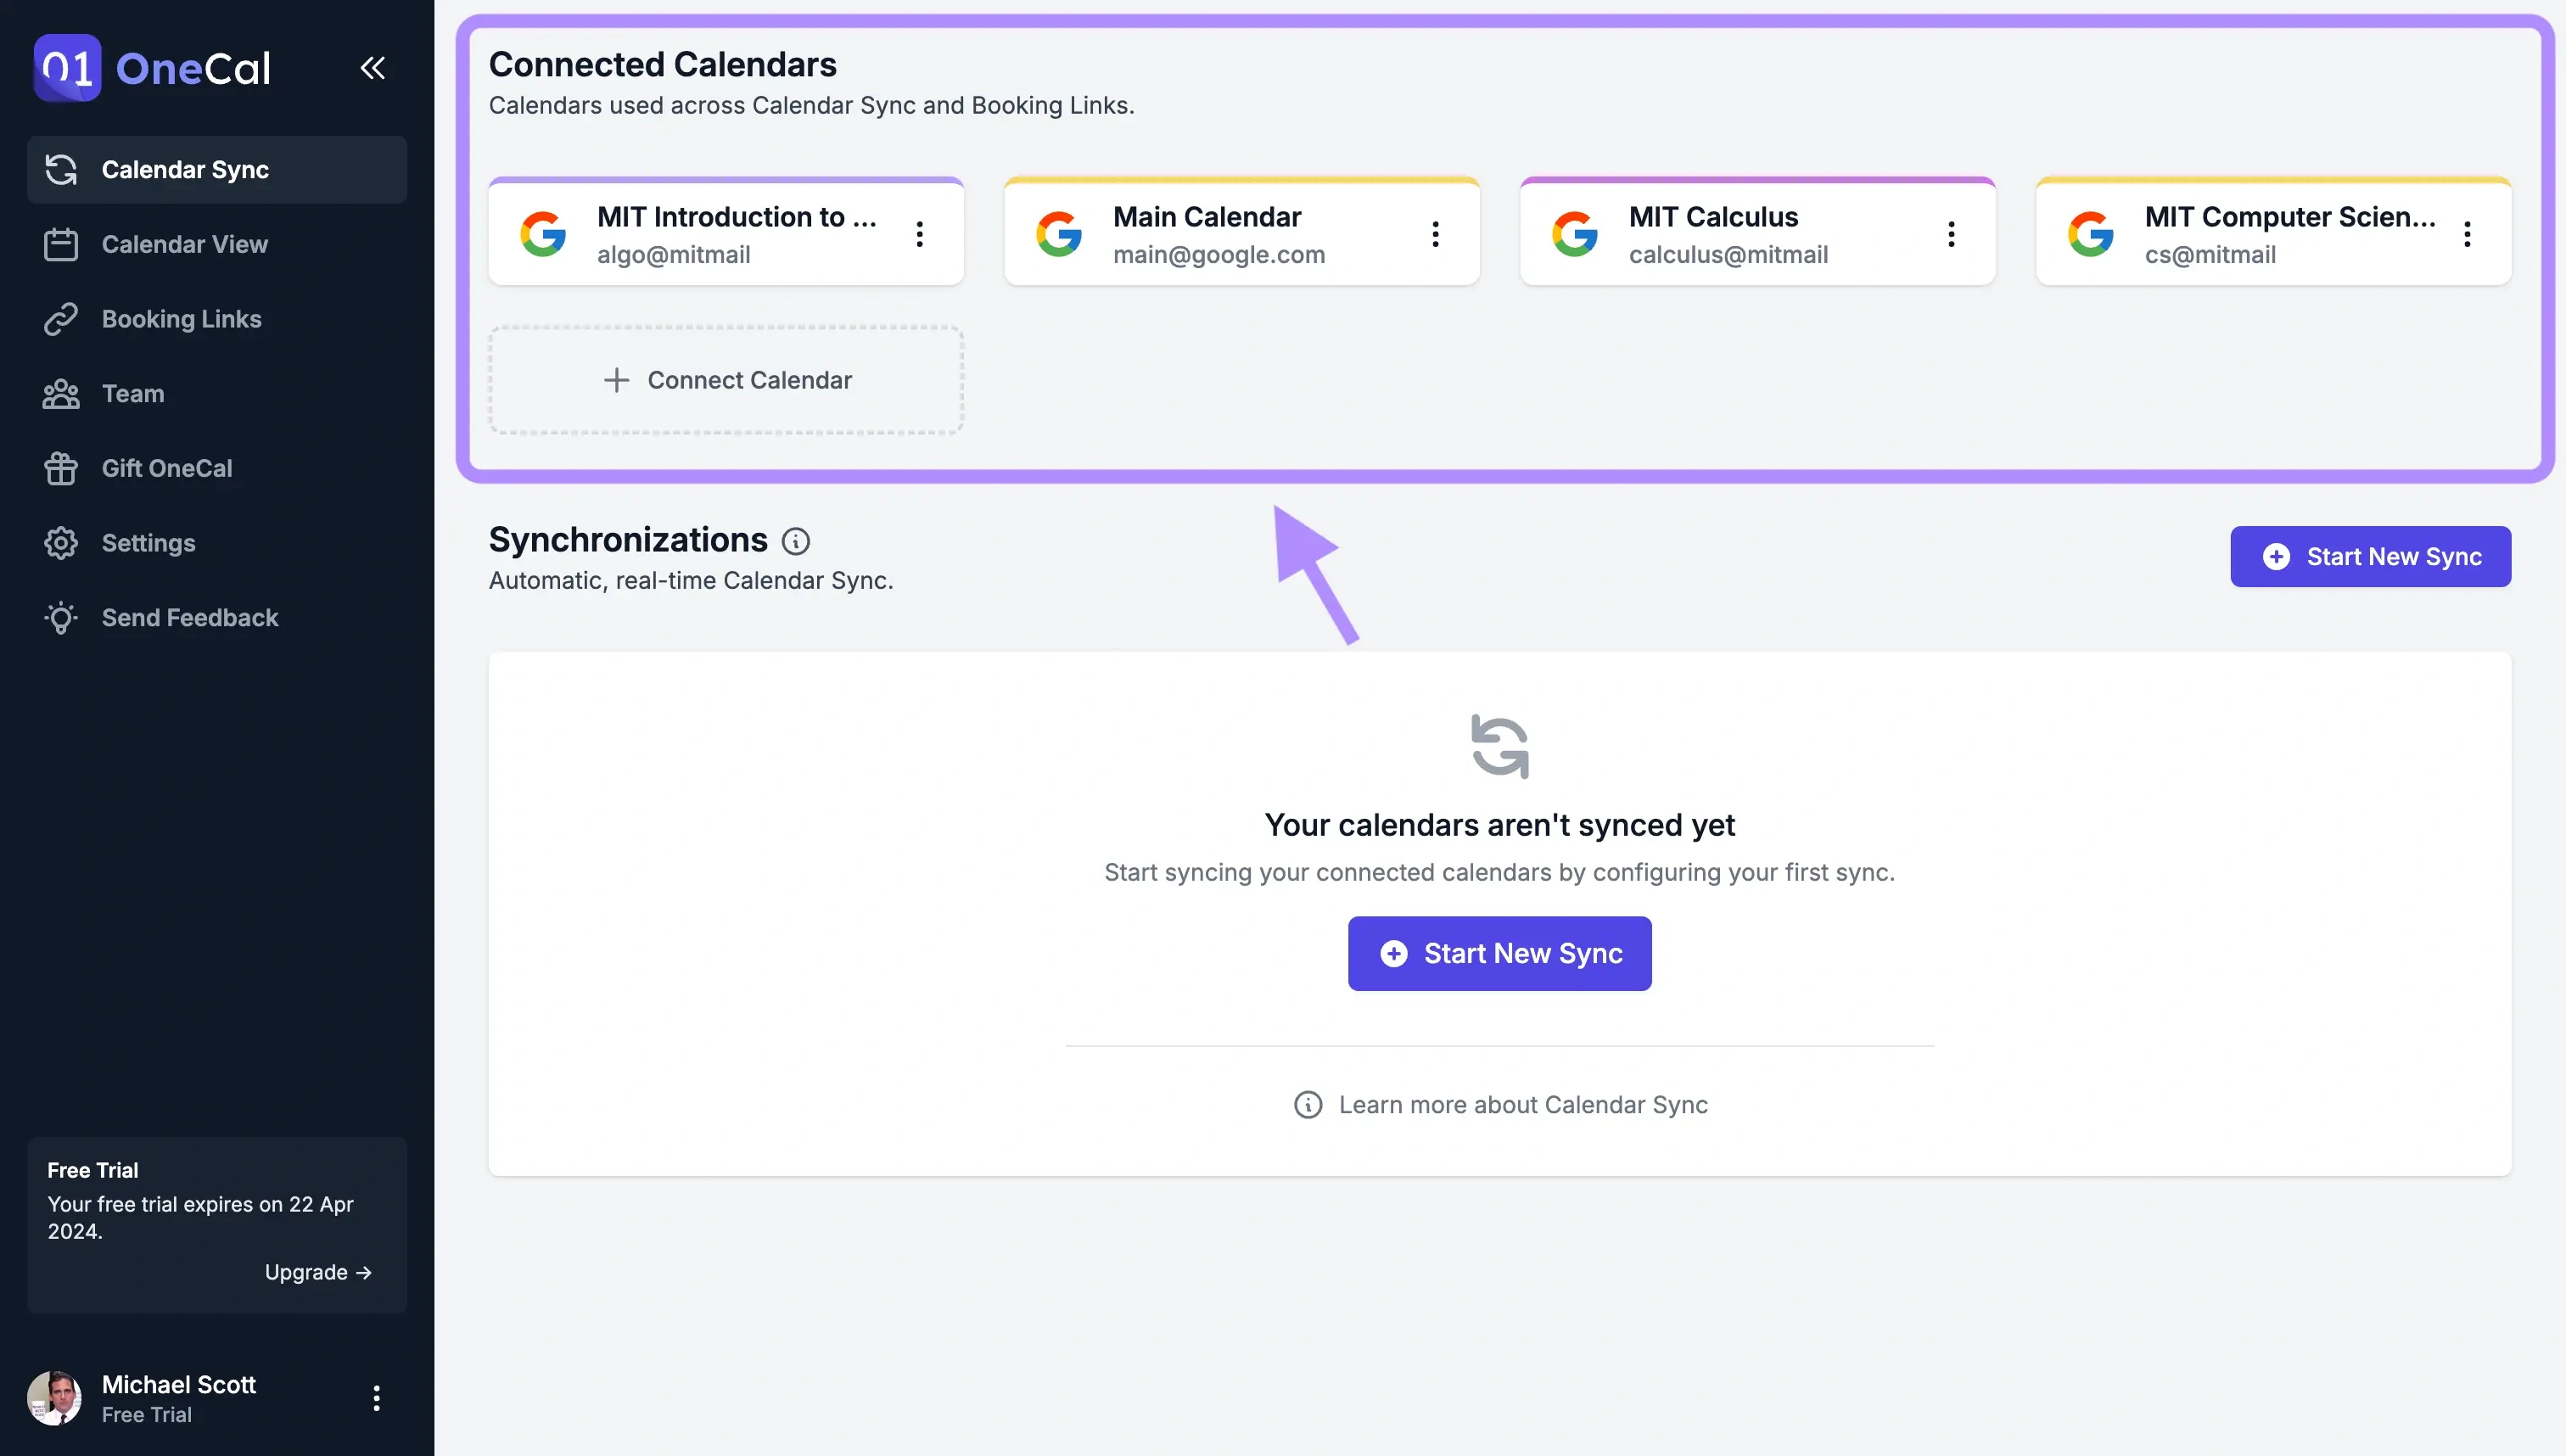
Connect all your class calendars and the calendar you want to sync all the class calendars with (main calendar): Connecting the class calendars is quite easy, as it uses the Google OAuth flow; as long as you’re logged into that class, you can connect the calendar right away. You’ll also need to connect to the calendar that contains all your classes.
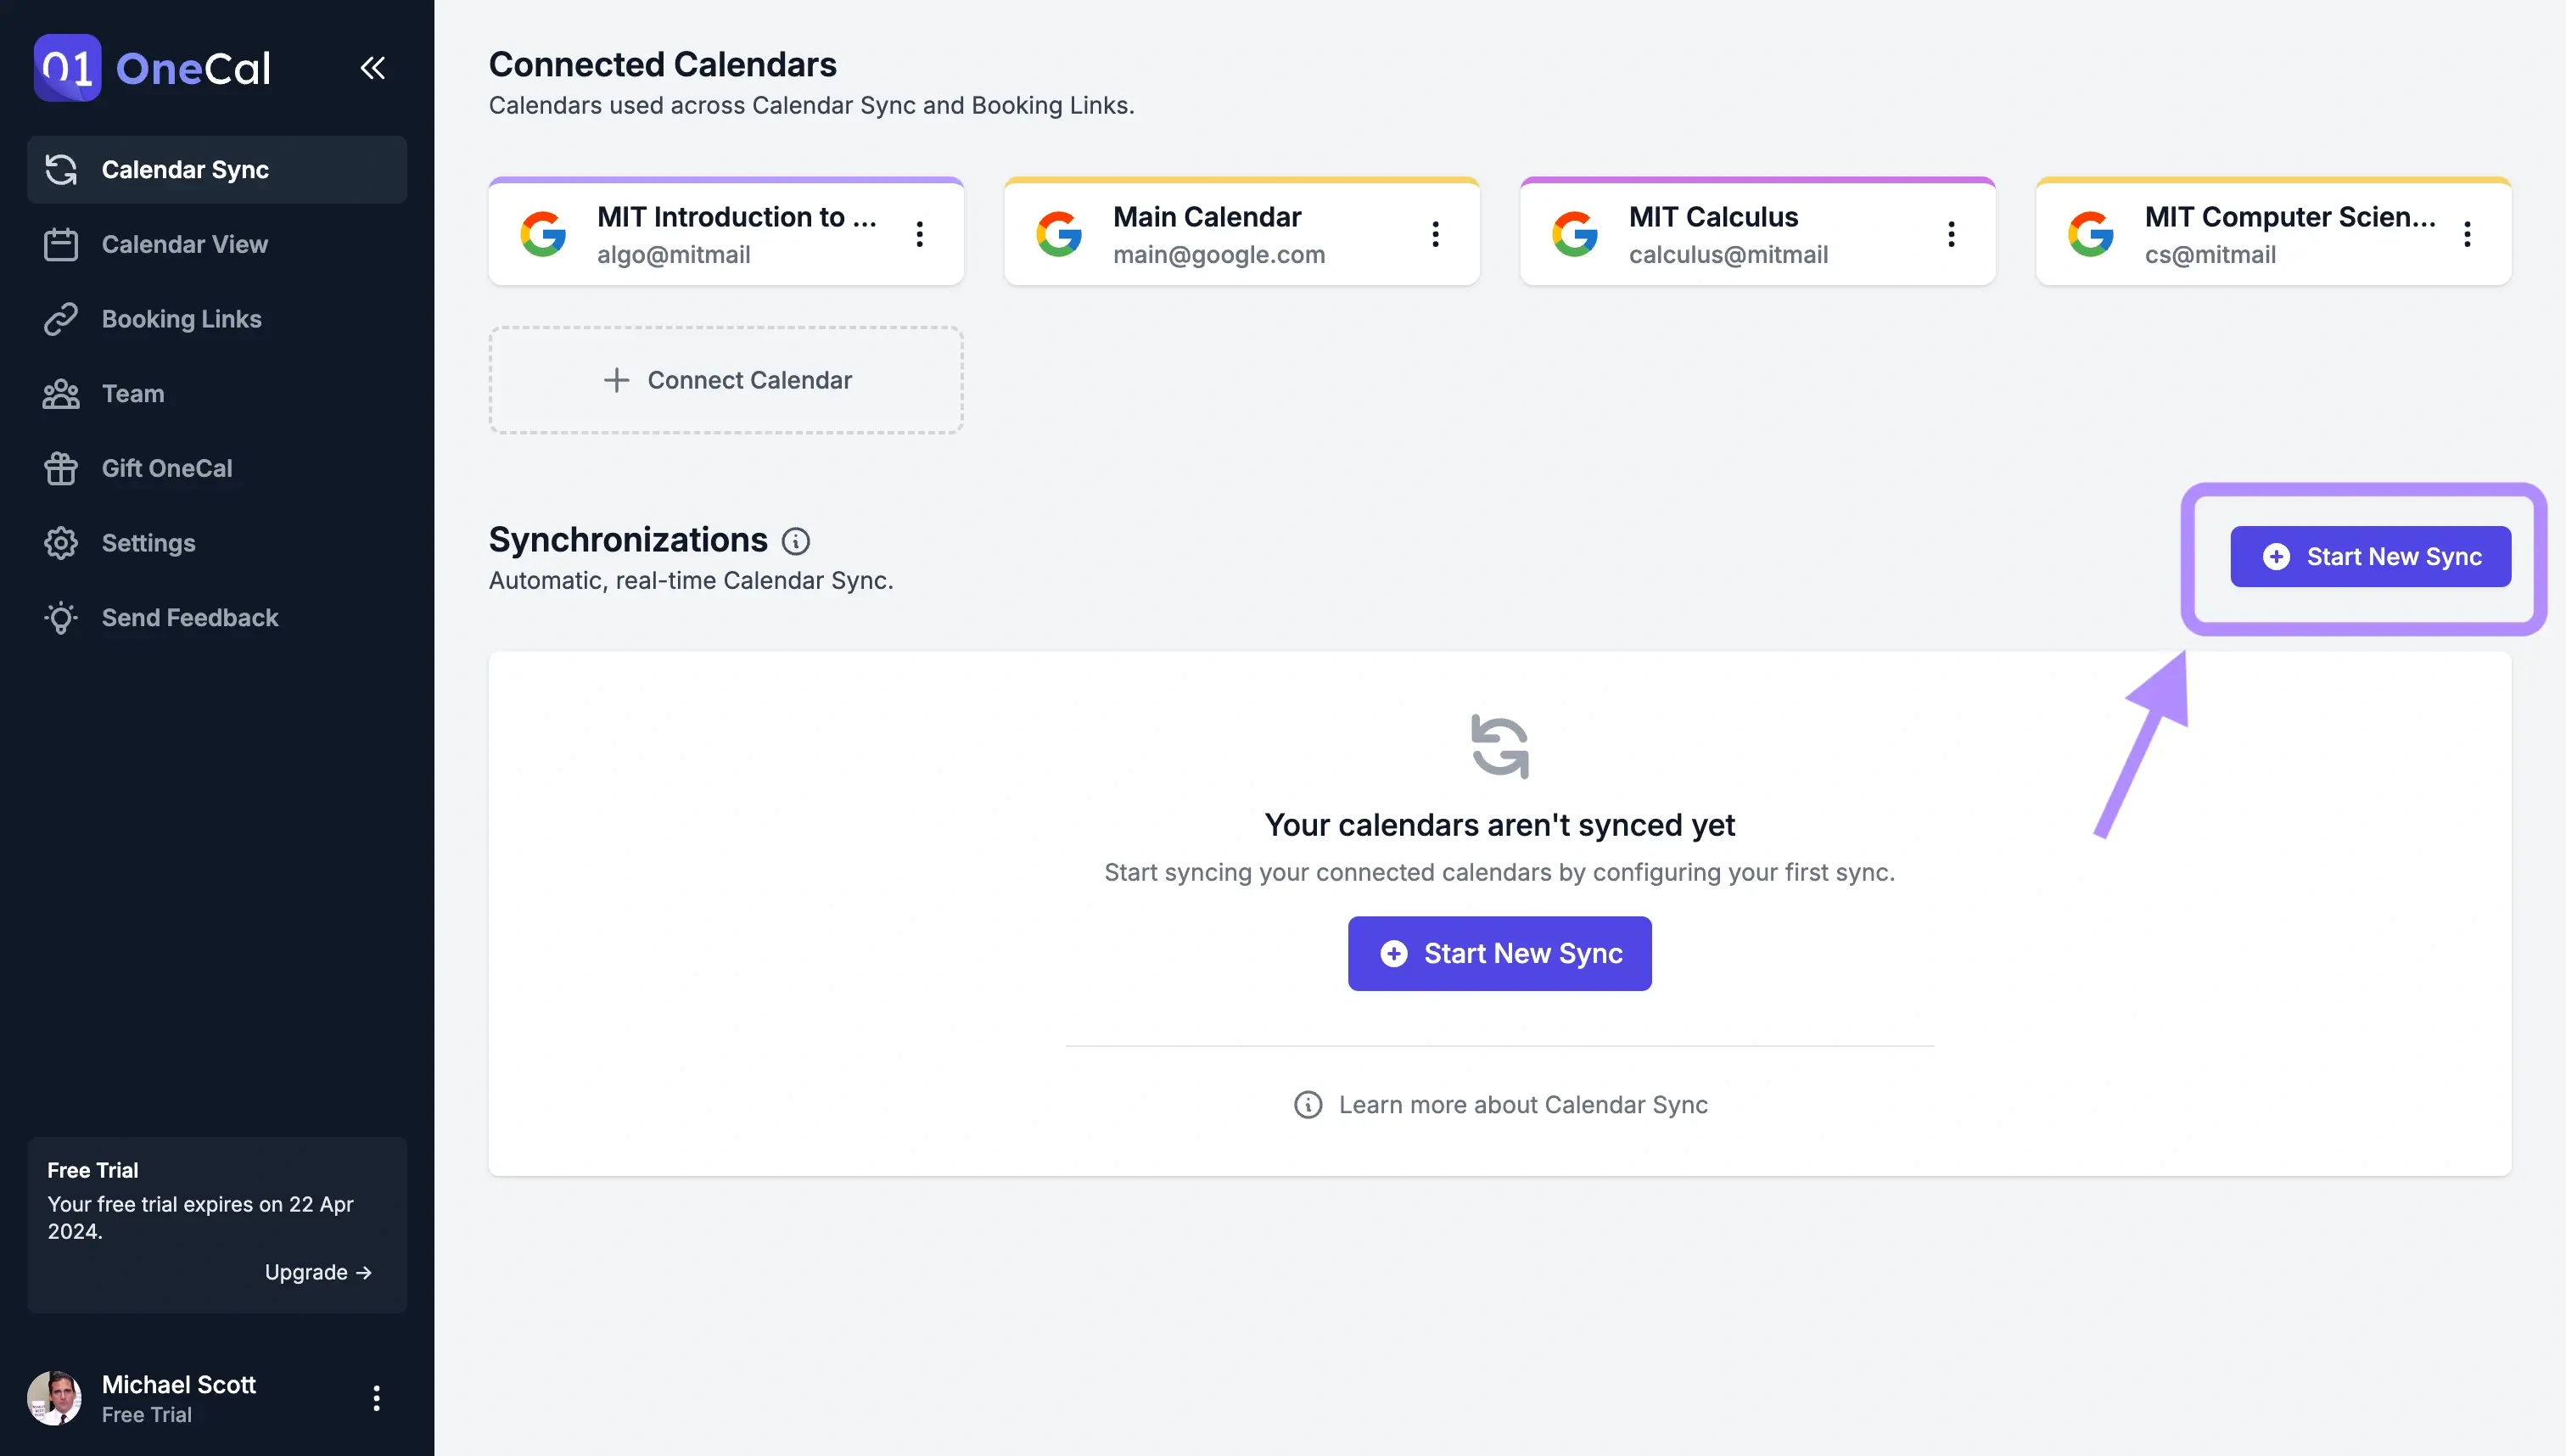
Click ‘Start New Sync’: After connecting your class calendars along with your main calendar, the next step is to start syncing each class with your main calendar.
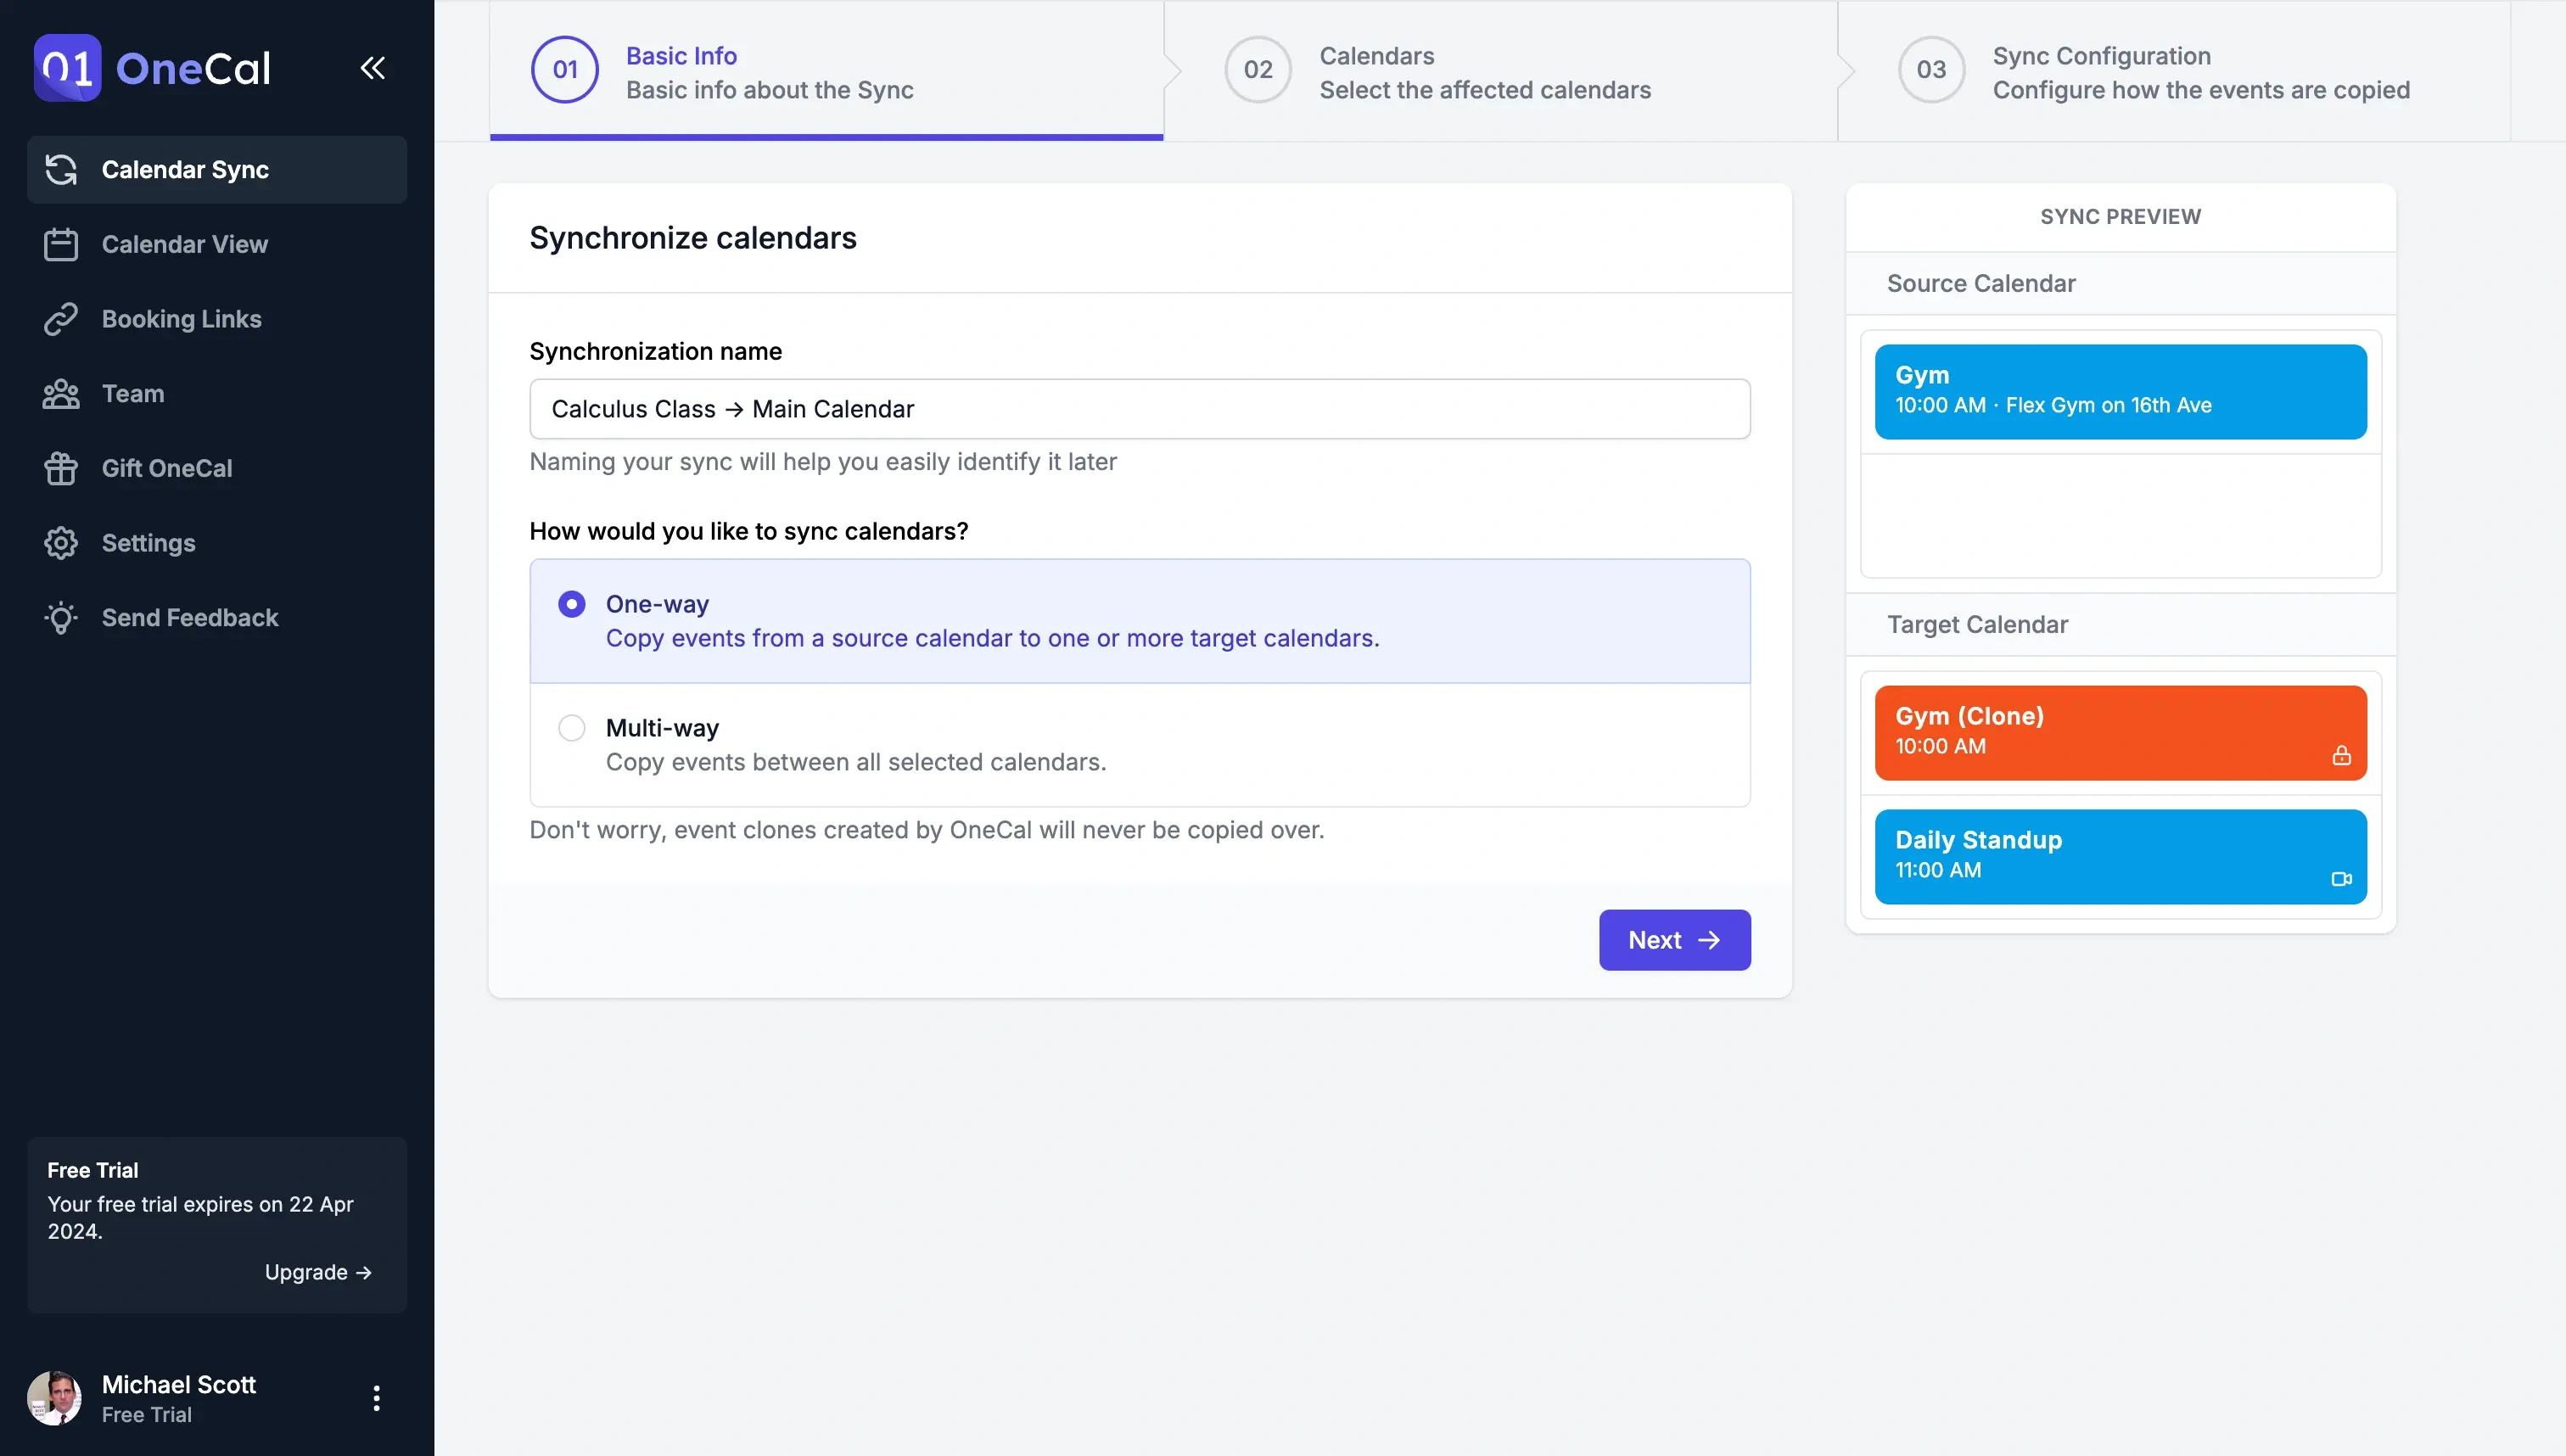
Give the sync a name and a direction: The name helps you identify the syncs from one another. The sync direction dictates the source of the events (from) and where to send them (Copy events from Calendar A to Calendar B)
One-way: Events go from one calendar to another (one source, multiple destinations).
Multi-way: Events go both ways; if you select n number of calendars, those calendars always stay in sync.
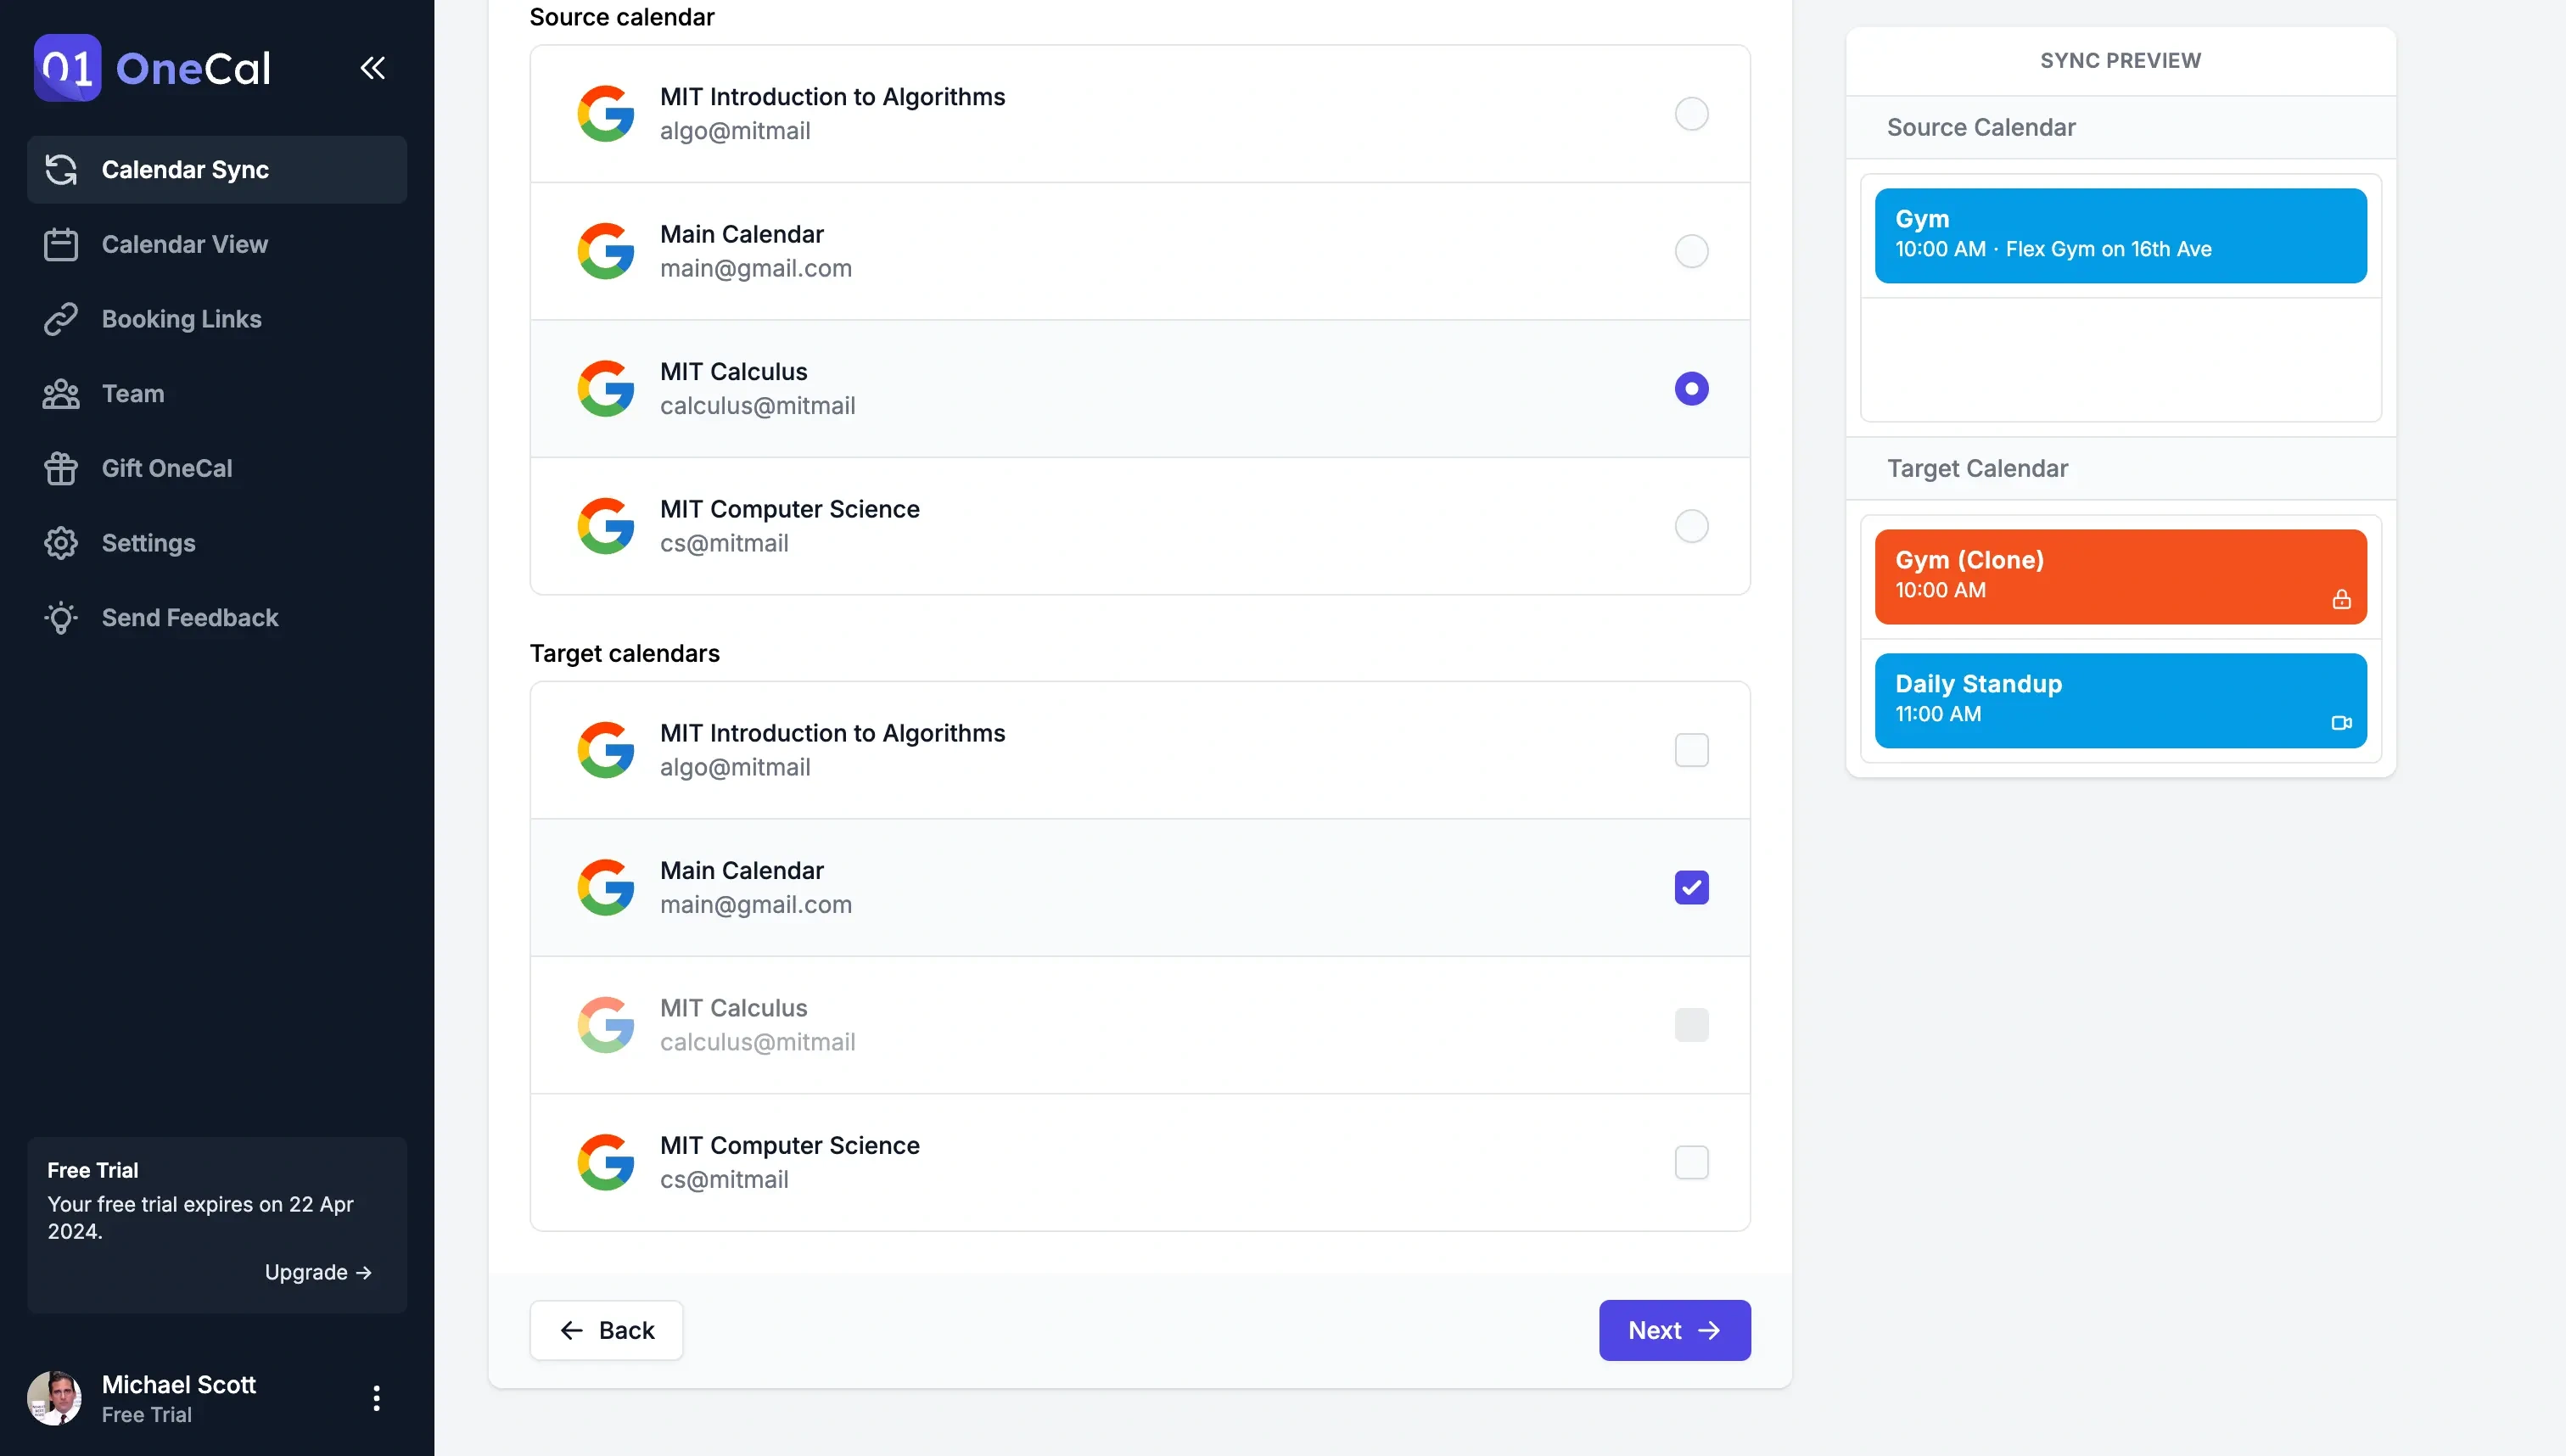
For this setup, we need the one-way direction, as we’ll sync each class calendar with the main calendar.Select the class calendar as source, and the main calendar as target: The source calendar should be one of the class calendars, and the target should be the calendar containing all your classes (main calendar).
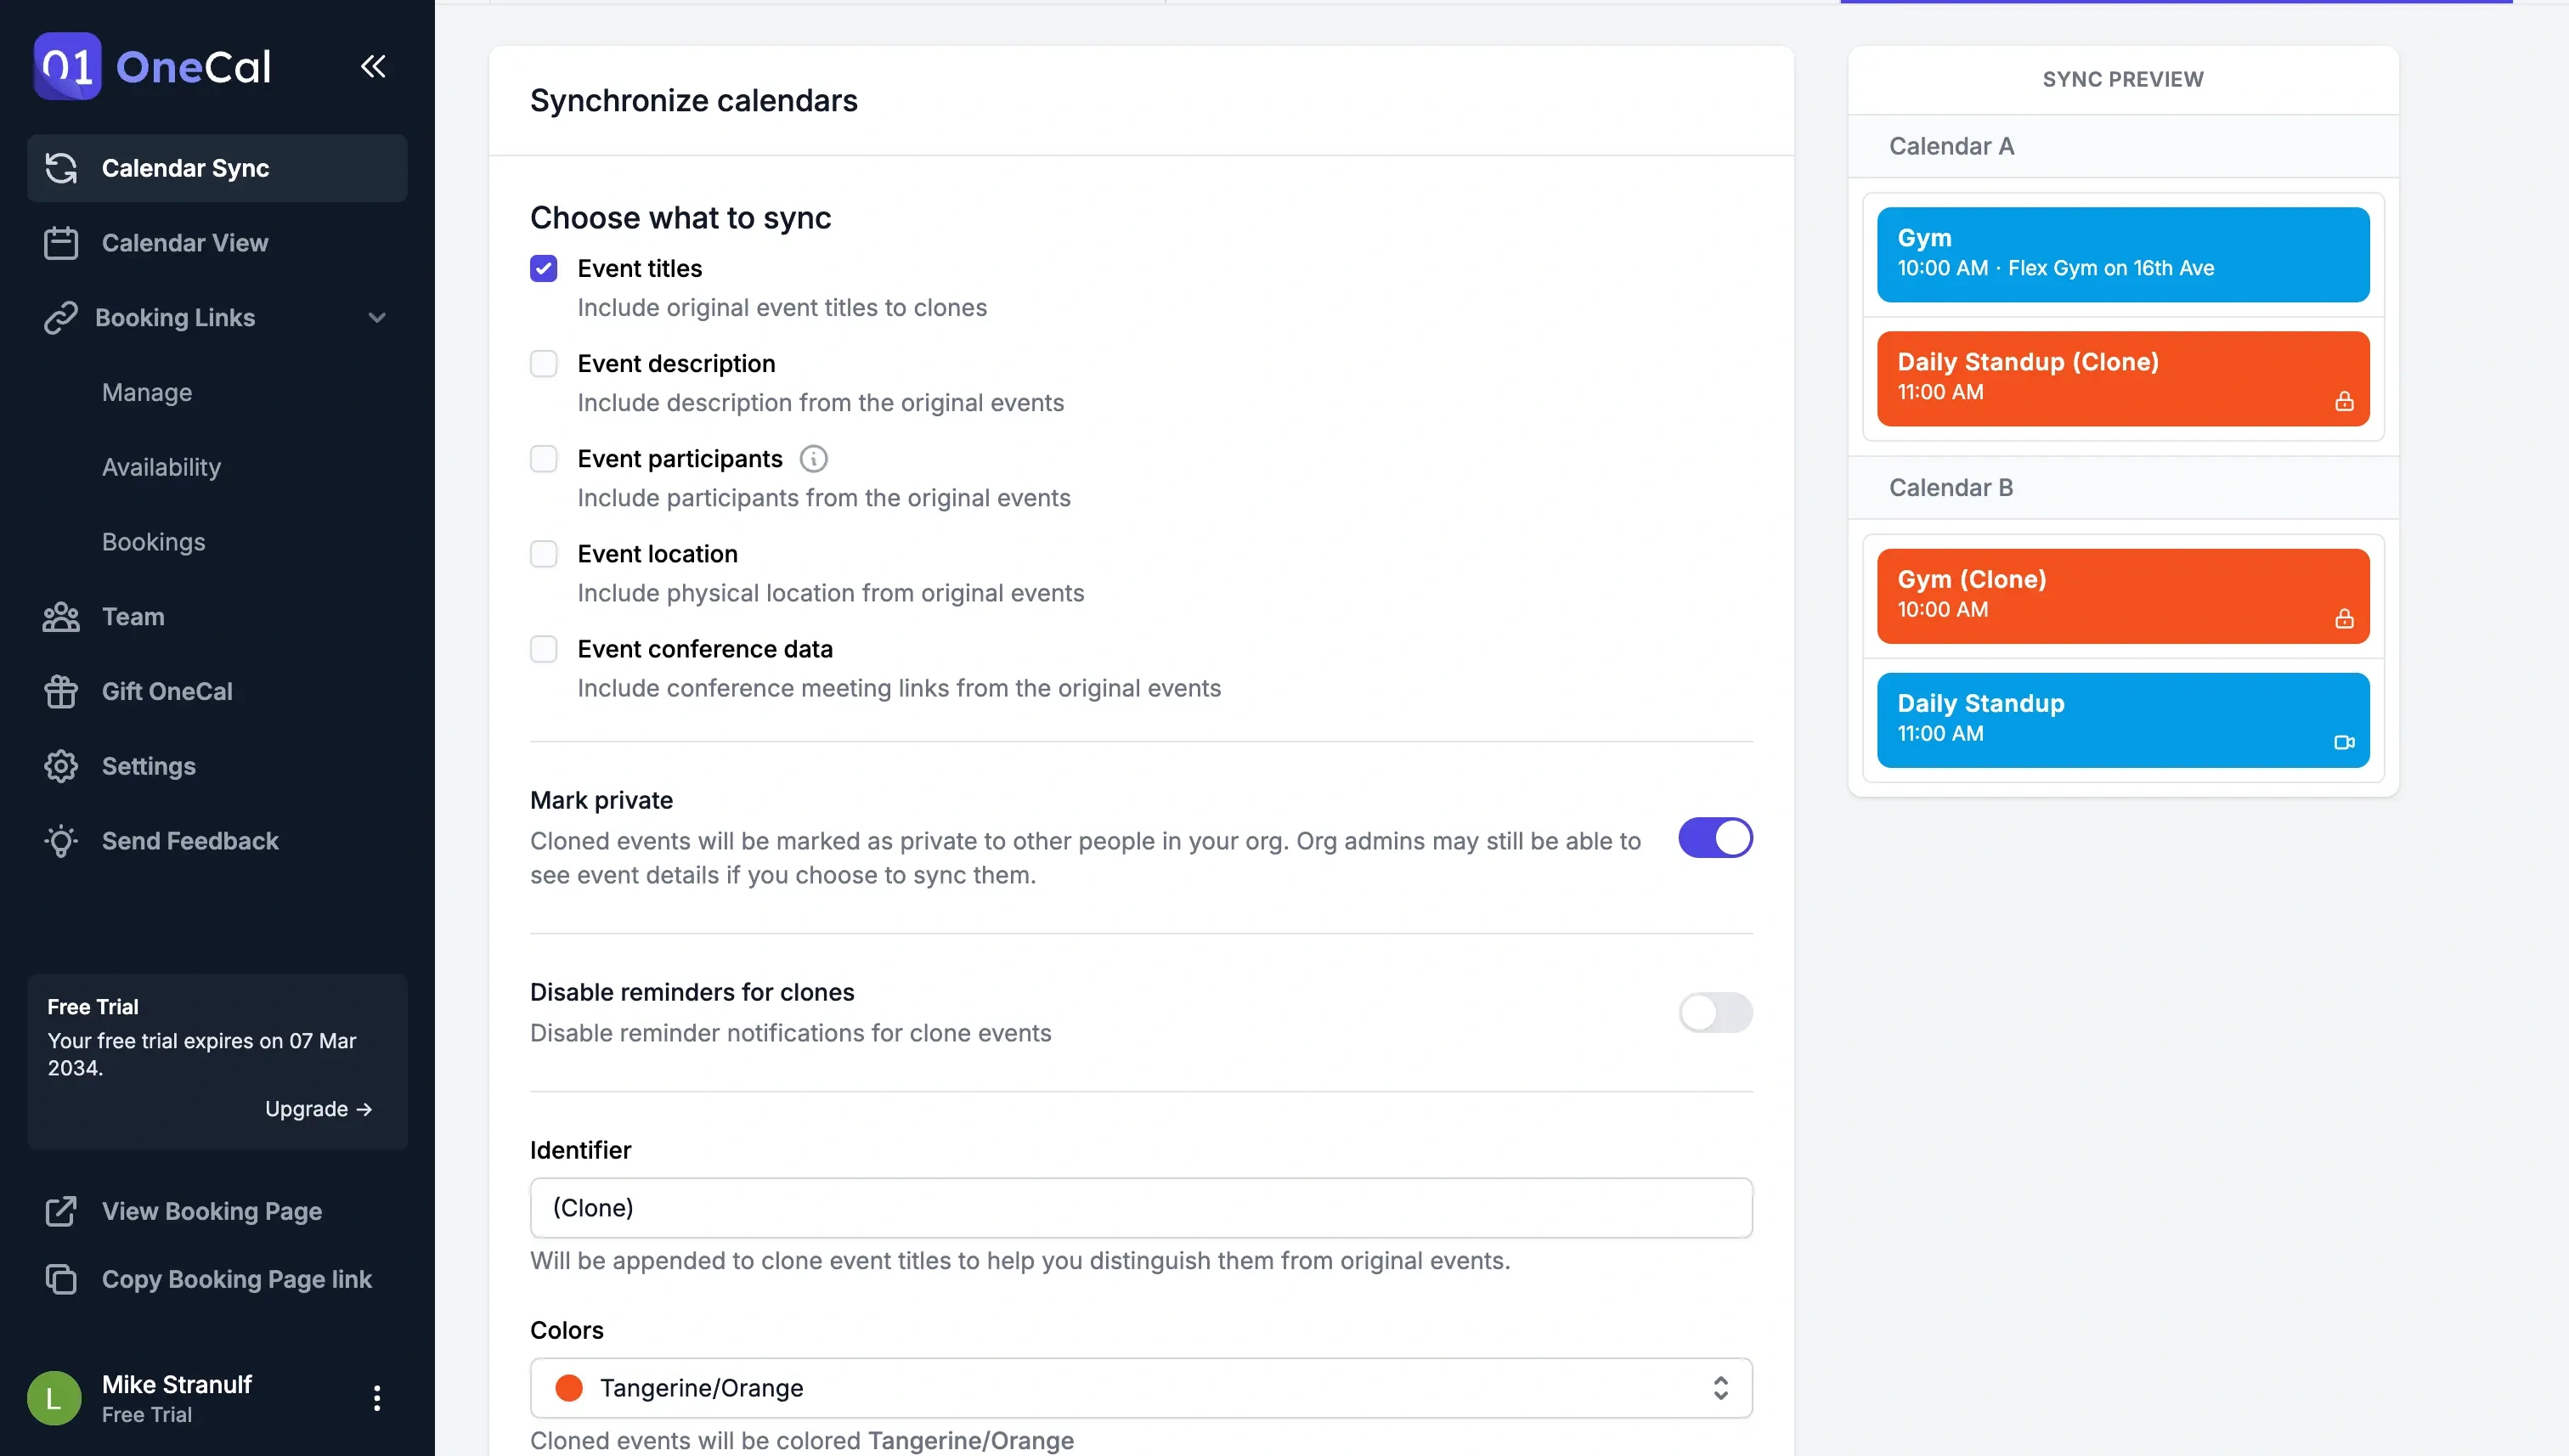
Select what to sync from your class calendar to your main calendar: Using OneCal you can choose what event properties to send to your main calendar. If you want to access your classes from the main calendar, you should select all fields, otherwise, leave them empty, and OneCal will only sync the time of the class.
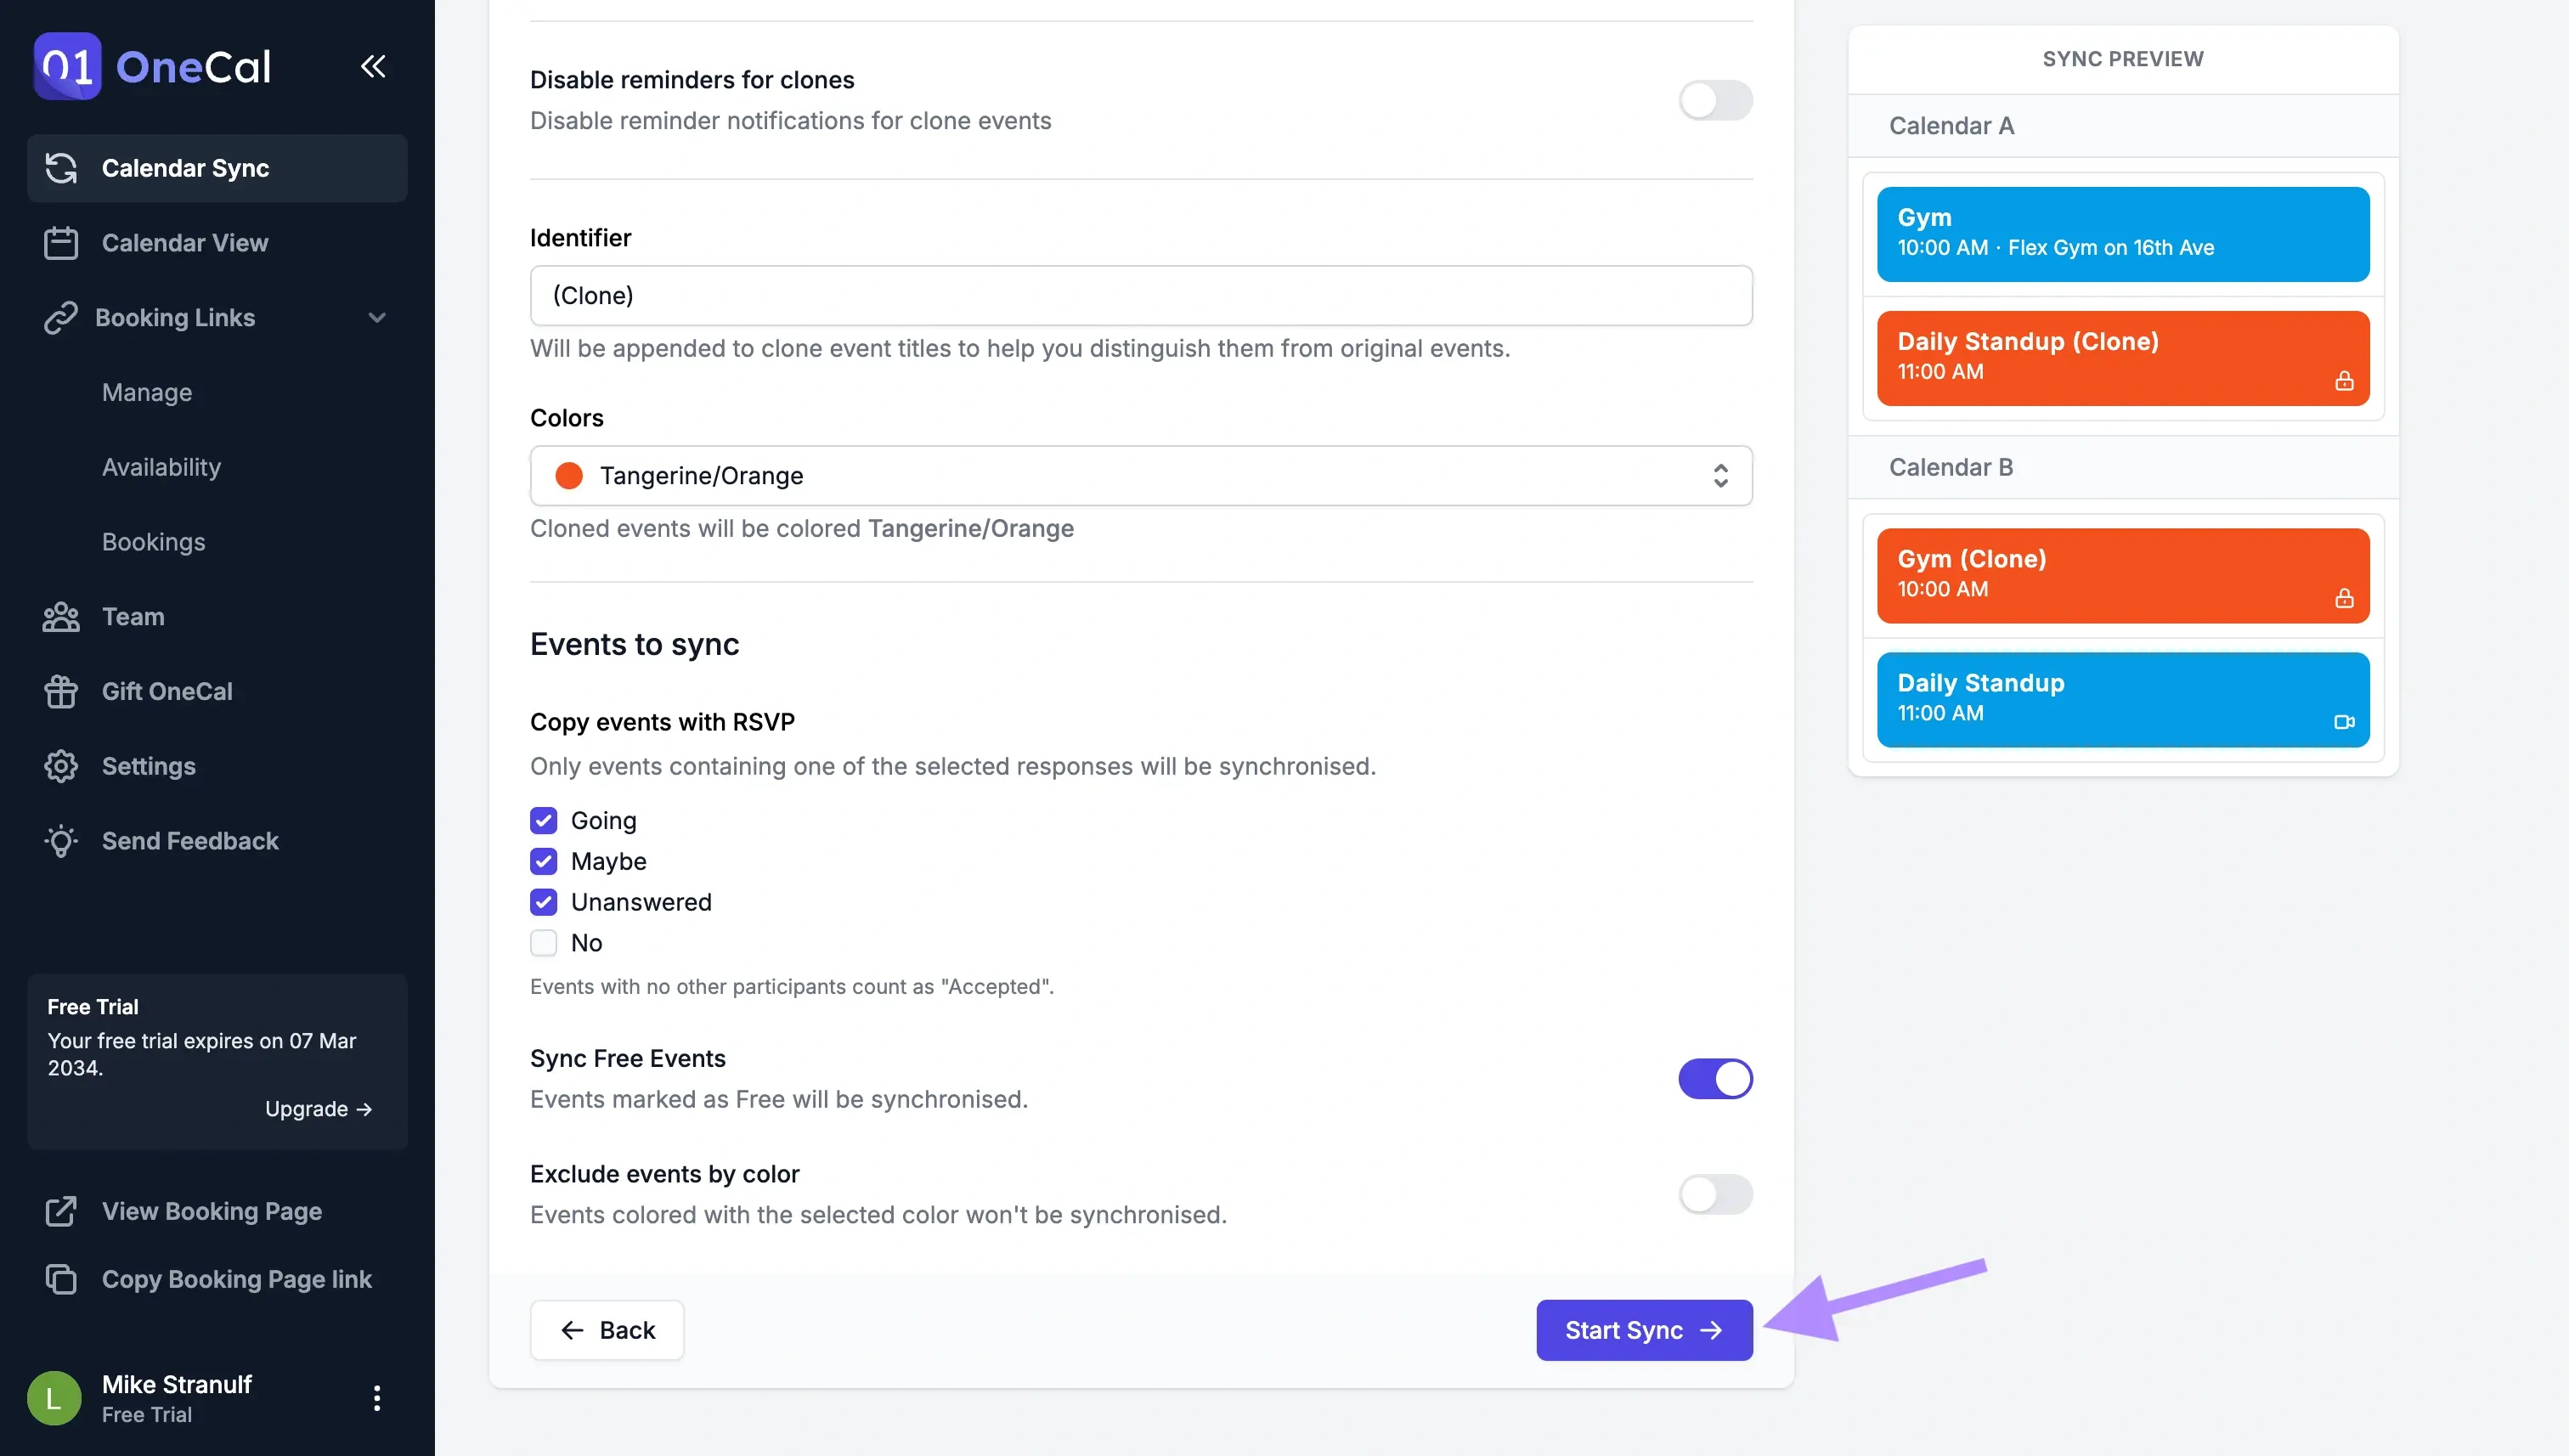
Click ‘Start Sync’: To complete the setup of syncing a class to the main calendar, click ‘Start Sync’.
Your class is now synced with your main calendar!
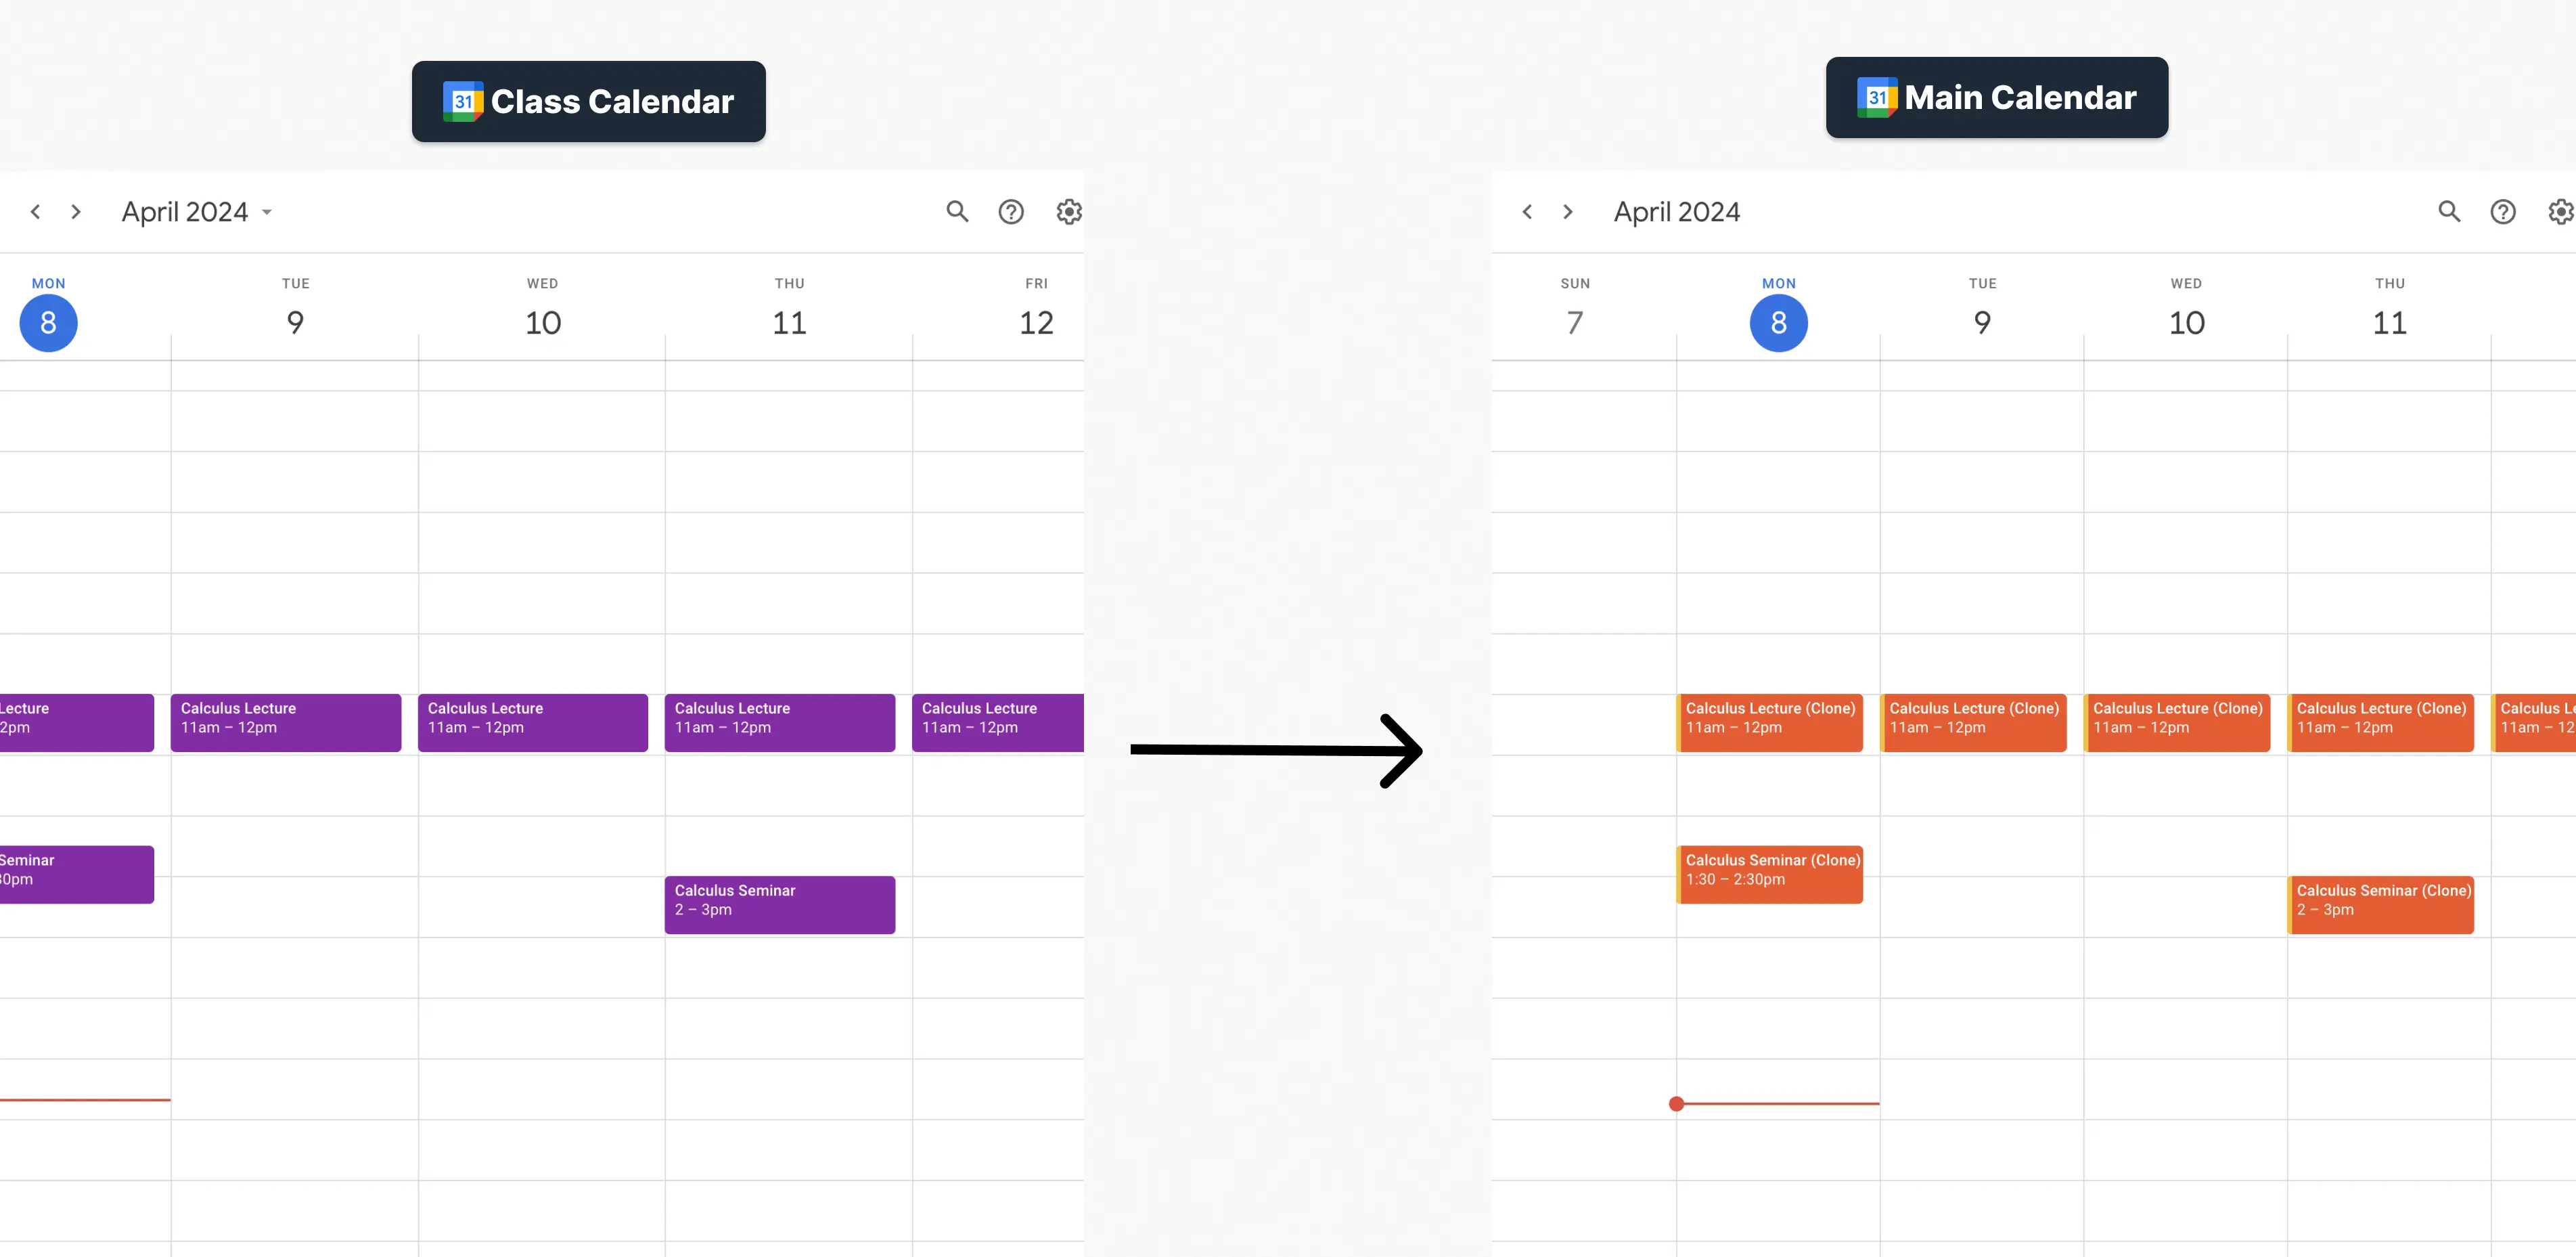
Following these steps, we have synced one class with the main calendar. You can follow the same steps to sync other classes to the same calendar, selecting Source Calendar for the other class and target calendar the same main calendar.
Here is how a setup syncing your class calendars into one calendar would look like:
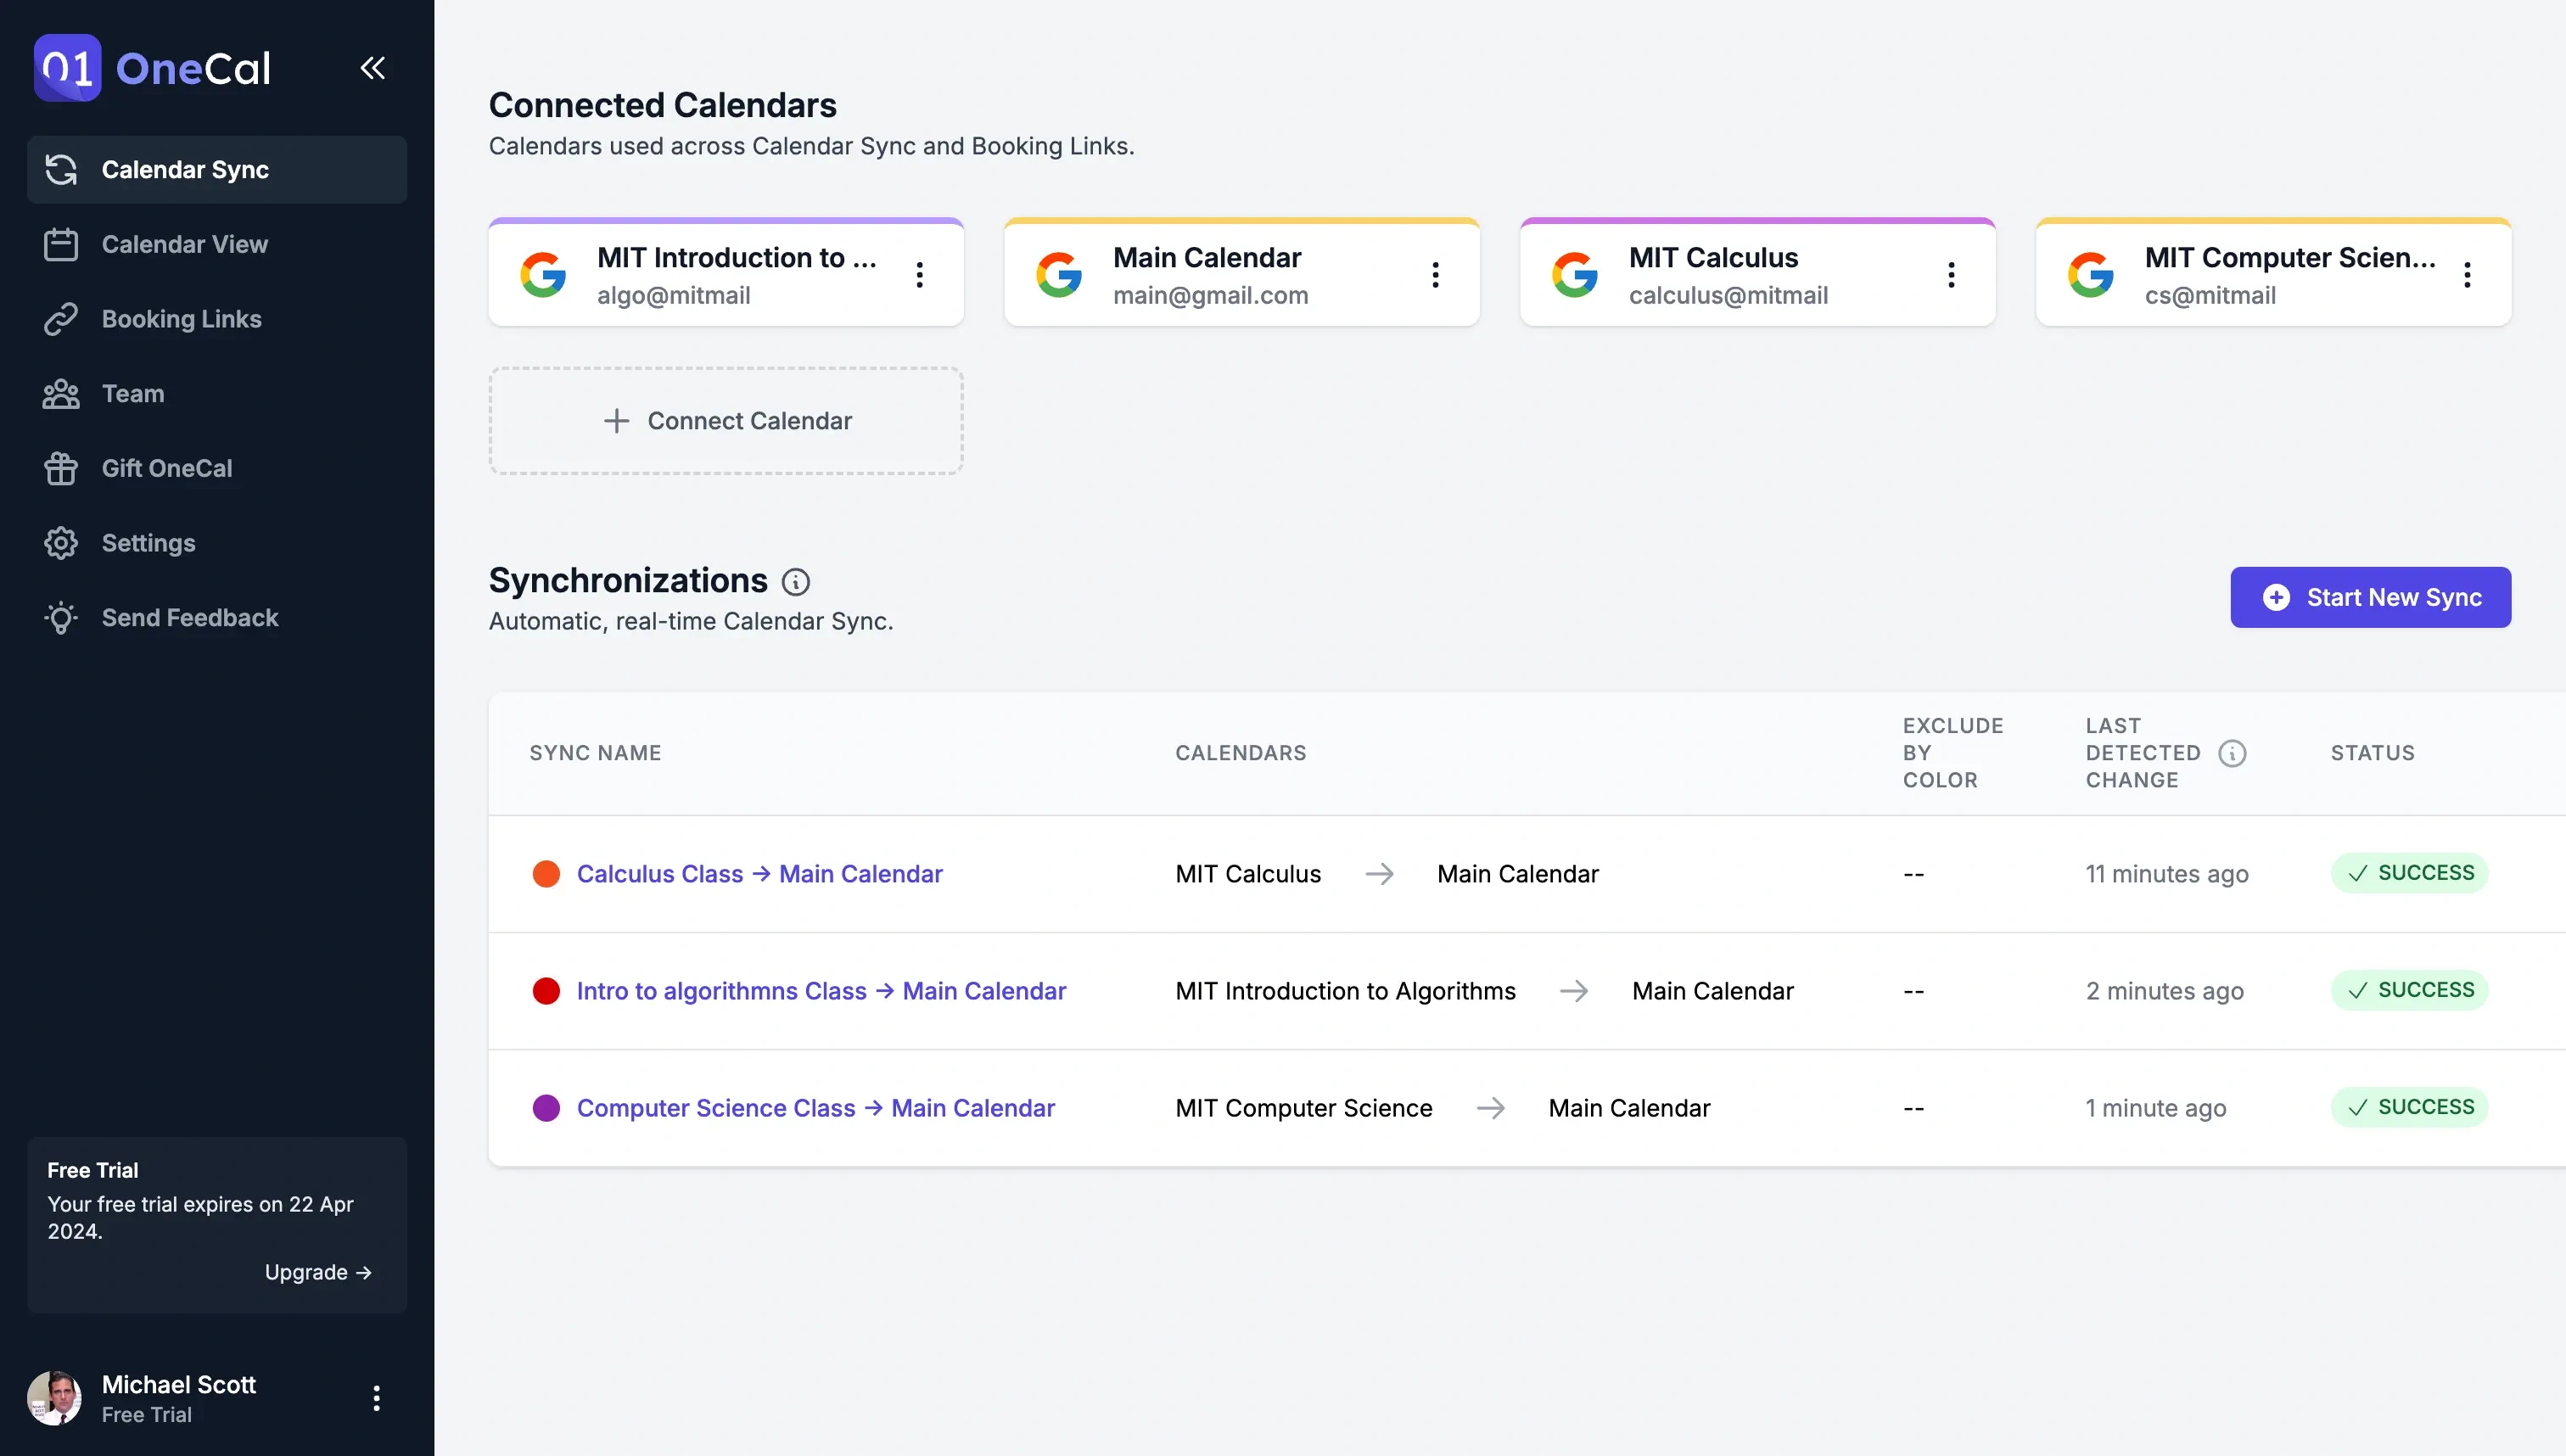
Use OneCal to sync all your class calendars in real-time
Thousands of professionals, students, and companies around the world use OneCal as their go-to tool for Calendar Synchronization and Booking Links.
Sign up for OneCal for free, no credit card needed, to seamlessly sync all your class calendars in real-time.
